c++创建对象带括号和不带括号的区别

1
2
3
4
5
6
class Test
{
public:
  Test() {}
  Test(int a) {}
}

1、栈上创建对象

1.1 无括号

1
Test a; // 调用默认构造函数,栈上分配内存创建对象

  1.2 有括号

1
2
//无任何意义,声明一个返回值为Test,参数为空,名字叫做a的函数
Test a();

  1.3 有括号+参数

1
2
//调用构造函数Test(int a),栈上分配内存创建对象
Test a(2);

2、堆上创建对象

2.1 无括号

1
2
//调用默认构造函数(若由编译器生成则成员不初始化),堆上分配内存创建对象
Test *a = new Test;

  2.2 有括号

1
2
//调用默认构造函数(若由编译器生成则成员初始化),堆上分配内存创建对象
Test *a = new Test();

  2.3 有括号+参数

1
Test *a = new Test(2); // 调用构造函数Test(int a),堆上分配内存创建对象

  2.4 系统内置类型

1
2
3
new int;// 分配内存,未初始化
new int();// 分配内存,初始化为0
new int(2);// 分配内存,初始化为2

转载自其他网站

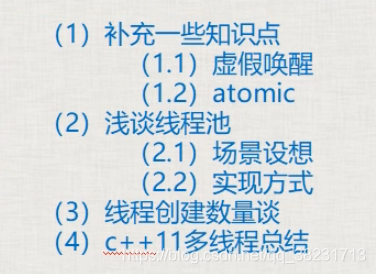
补充知识、线程池浅谈、数量谈、总结

第十三章 补充知识、线程池浅谈、数量谈、总结

在这里插入图片描述

一、补充一些知识点
1.1 虚假唤醒:
notify_one或者notify_all唤醒wait()后,实际有些线程可能不满足唤醒的条件,就会造成虚假唤醒,可以在wait中再次进行判断解决虚假唤醒。
解决:wait中要有第二个参数(lambda),并且这个lambda中要正确判断所处理的公共数据是否存在。

2.2 atomic:

1
2
3
std::atomic<int> atm = 0;
cout << atm << endl;

这里只有读取atm是原子操作,但是整个这一行代码 cout << atm << endl; 并不是原子操作,导致最终显示在屏幕上的值是一个“曾经值”。

1
2
3
std::atomic<int> atm = 0;
auto atm2 = atm; //不可以

这种拷贝初始化不可以,会报错。

1
atomic<int> atm2(atm.load());

load():以原子方式读atomic对象的值。

1
atm2.store(12);

原子操作实质上是:不允许在进行原子对象操作时进行CPU的上下文切换。

二、浅谈线程池:
场景设想:服务器程序, 每来一个客户端,就创建一个新线程为这个客户提供服务。

问题:

1、2万个玩家,不可能给每个玩家创建一个新线程,此程序写法在这种场景下不通。

2、程序稳定性问题:编写代码中,“时不时地突然”创建一个线程,这种写法,一般情况下不会出错,但是不稳定的;

线程池:把一堆线程弄到一起,统一管理。这种统一管理调度,循环利用的方式,就叫做线程池。

实现方式:程序启动时,一次性创建好一定数量的线程。这种方式让人更放心,觉得程序代码更稳定。

三、线程创建数量谈:

1、线程创建的数量极限的问题

一般来讲,2000个线程基本就是极限;再创建就会崩溃。

2、线程创建数量建议

a、采用某些计数开发程序提供的建议,遵照建议和指示来确保程序高效执行。

b、创建多线程完成业务;考虑可能被阻塞的线程数量,创建多余最大被阻塞线程数量的线程,如100个线程被阻塞再充值业务,开110个线程就是很合适的

c、线程创建数量尽量不要超过500个,尽量控制在200个之内;

windows临界区、其他各种mutex互斥量

第十二节 windows临界区、其他各种mutex互斥量

在这里插入图片描述

一和二、windows临界区
Windows临界区,同一个线程是可以重复进入的,但是进入的次数与离开的次数必须相等。
C++互斥量则不允许同一个线程重复加锁。

windows临界区是在windows编程中的内容,了解一下即可,效果几乎可以等同于c++11的mutex
包含#include
windows中的临界区同mutex一样,可以保护一个代码段。但windows的临界区可以进入多次,离开多次,但是进入的次数与离开的次数必须相等,不会引起程序报异常出错。

1
2
3
4
5
6
7
8
9
10
11
12
13
14
15
16
17
18
19
20
21
22
23
24
25
26
27
28
29
30
31
32
33
34
35
36
37
38
39
40
41
42
43
44
45
46
47
48
49
50
51
52
53
54
55
56
57
58
59
60
61
62
63
64
65
66
67
68
69
70
71
72
73
74
75
76
77
78
79
80
81
82
83
84
85
86
87
88
89
90
91
92
93
94
95
96
97
98
99
100
101
102
103
104
105
106
107
#include <iostream>
#include <thread>
#include <list>
#include <mutex>
#include <Windows.h>
#define __WINDOWSJQ_
using namespace std;
class A
{
public:
// 把收到的消息传入队列
void inMsgRecvQueue()
{
for (size_t i = 0; i < 1000; ++i)
{
cout << "收到消息,并放入队列 " << i << endl;
#ifdef __WINDOWSJQ_
EnterCriticalSection(&my_winsec); // 进入临界区
//EnterCriticalSection(&my_winsec); // 可以再次进入临界区,程序不会出错
msgRecvQueue.push_back(i);
LeaveCriticalSection(&my_winsec); // 离开临界区
//LeaveCriticalSection(&my_winsec); // 如果进入两次,必须离开两次不会报错
#elif
my_mutex.lock();
msgRecvQueue.push_back(i);
my_mutex.unlock();
#endif // __WINDOWSJQ_
}
cout << "消息入队结束" << endl;
}
// 从队列中取出消息
void outMsgRecvQueue()
{
for (size_t i = 0; i < 1000; ++i)
{
#ifdef __WINDOWSJQ_
EnterCriticalSection(&my_winsec); // 进入临界区
if (!msgRecvQueue.empty())
{
// 队列不为空
int num = msgRecvQueue.front();
cout << "从消息队列中取出 " << num << endl;
msgRecvQueue.pop_front();
}
else
{
// 消息队列为空
cout << "消息队列为空 " << endl;
}
LeaveCriticalSection(&my_winsec); // 离开临界区
#elif
my_mutex.lock();
if (!msgRecvQueue.empty())
{
// 队列不为空
int num = msgRecvQueue.front();
cout << "从消息队列中取出 " << num << endl;
msgRecvQueue.pop_front();
my_mutex.unlock();
}
else
{
// 消息队列为空
cout << "消息队列为空 " << endl;
my_mutex.unlock();
}
#endif // __WINDOWSJQ_
}
cout << "消息出队结束" << endl;
}
A()
{
#ifdef __WINDOWSJQ_
InitializeCriticalSection(&my_winsec); // 用临界区之前要初始化
#endif // __WINDOWSJQ_
}
private:
list<int> msgRecvQueue;
mutex my_mutex;
#ifdef __WINDOWSJQ_
CRITICAL_SECTION my_winsec; // windows中的临界区,非常类似C++11中的mutex
#endif // __WINDOWSJQ_
};
int main()
{
A myobj;
thread myInMsgObj(&A::inMsgRecvQueue, &myobj);
thread myOutMsgObj(&A::outMsgRecvQueue, &myobj);
myInMsgObj.join();
myOutMsgObj.join();
getchar();
return 0;
}

三、自动析构技术
C++:lock_guard防止忘了释放信号量,自动释放
windows:可以写个类自动释放临界区:

1
2
3
4
5
6
7
8
9
10
11
12
13
14
class CWinLock {
public:
CWinLock(CRITICAL_SECTION *pCritmp)
{
my_winsec =pCritmp;
EnterCriticalSection(my_winsec);
}
~CWinLock()
{
LeaveCriticalSection(my_winsec)
};
private:
CRITICAL_SECTION *my_winsec;
};

上述这种类RAII类(Resource Acquisition is initialization),即资源获取及初始化。容器,智能指针属于这种类。

四、递归独占互斥量 std::recursive_mutex
std::mutex 独占式互斥量

std::recursive_mutex:允许在同一个线程中同一个互斥量多次被 lock() ,(但是递归加锁的次数是有限制的,太多可能会报异常),效率要比mutex低。

如果你真的用了 recursive_mutex 要考虑代码是否有优化空间,如果能调用一次 lock()就不要调用多次。

五、带超时的互斥量 std::timed_mutex 和 std::recursive_timed_mutex

5.1 std::timed_mutex:是待超时的独占互斥量

  • try_lock_for():

等待一段时间,如果拿到了锁,或者超时了未拿到锁,就继续执行(有选择执行)如下:

1
2
3
4
5
6
7
8
std::chrono::milliseconds timeout(100);
if (my_mymutex.try_lock_for(timeout)){
//......拿到锁返回ture
}
else{
std::chrono::milliseconds sleeptime(100);
std::this_thread::sleep_for(sleeptime);
}
  • try_lock_until():

参数是一个未来的时间点,在这个未来的时间没到的时间内,如果拿到了锁头,流程就走下来,如果时间到了没拿到锁,流程也可以走下来。

1
2
3
4
5
6
7
8
std::chrono::milliseconds timeout(100);
if (my_mymutex.try_lock_until(chrono::steady_clock::now() + timeout)){
//......拿到锁返回ture
}
else{
std::chrono::milliseconds sleeptime(100);
std::this_thread::sleep_for(sleeptime);
}

两者的区别就是一个参数是时间段,一个参数是时间点

5.2 std::recursive_timed_mutex:是待超时的递归独占互斥量

std::atomic续谈、std::async深入谈

第十一节 std::atomic续谈、std::async深入谈

在这里插入图片描述

一、std::atomic续谈

1
2
3
4
5
6
7
8
9
10
11
12
13
14
15
16
17
18
19
20
21
#include <iostream>
#include <thread>
#include <atomic>
using namespace std;
std::atomic<int> g_count = 0; //封装了一个类型为int的 对象(值)
void mythread1() {
for (int i = 0; i < 1000000; i++) {
//虽然g_count使用了原子操作模板,但是这种写法既读又写,
//会导致计数错误
g_count = g_count + 1;
}
}
int main() {
std::thread t1(mythread1);
std::thread t2(mythread1);
t1.join();
t2.join();
cout << "正常情况下结果应该是200 0000次,实际是" << g_count << endl;
}

在这里插入图片描述

一般atomic原子操作,针对++,–,+=,-=,&=,|=,^=是支持的,其他操作不一定支持。

二、std::async深入理解
2.1 std::async参数详述,async 用来创建一个异步任务

延迟调用参数 std::launch::deferred【延迟调用】,std::launch::async【强制创建一个线程】

std::async()我们一般不叫创建线程(他能够创建线程),我们一般叫它创建一个异步任务。

std::async和std::thread最明显的不同,就是 async 有时候并不创建新线程。

①如果用std::launch::deferred 来调用async?

延迟到调用 get() 或者 wait() 时执行,如果不调用就不会执行

②如果用std::launch::async来调用async?

强制这个异步任务在新线程上执行,这意味着,系统必须要创建出新线程来运行入口函数。

③如果同时用 std::launch::async | std::launch::deferred

这里这个或者关系意味着async的行为可能是 std::launch::async 创建新线程立即执行, 也可能是 std::launch::deferred 没有创建新线程并且延迟到调用get()执行,由系统根据实际情况来决定采取哪种方案

④不带额外参数 std::async(mythread),只给async 一个入口函数名,此时的系统给的默认值是 std::launch::async | std::launch::deferred 和 ③ 一样,有系统自行决定异步还是同步运行。

2.2 std::async和std::thread()区别:

std::thread()如果系统资源紧张可能出现创建线程失败的情况,如果创建线程失败那么程序就可能崩溃,而且不容易拿到函数返回值(不是拿不到)
std::async()创建异步任务。可能创建线程也可能不创建线程,并且容易拿到线程入口函数的返回值;

由于系统资源限制:
①如果用std::thread创建的线程太多,则可能创建失败,系统报告异常,崩溃。

②如果用std::async,一般就不会报异常,因为如果系统资源紧张,无法创建新线程的时候,async不加额外参数的调用方式就不会创建新线程。而是在后续调用get()请求结果时执行在这个调用get()的线程上。

如果你强制async一定要创建新线程就要使用 std::launch::async 标记。承受的代价是,系统资源紧张时可能崩溃。

③根据经验,一个程序中线程数量 不宜超过100~200 。

2.3 async不确定性问题的解决
不加额外参数的async调用时让系统自行决定,是否创建新线程。

std::future result = std::async(mythread);
问题焦点在于这个写法,任务到底有没有被推迟执行。

通过wait_for返回状态来判断:

1
2
3
4
5
6
7
8
9
10
11
12
13
14
15
std::future_status status = result.wait_for(std::chrono::seconds(6));
//std::future_status status = result.wait_for(6s);
if (status == std::future_status::timeout) {
//超时:表示线程还没有执行完
cout << "超时了,线程还没有执行完" << endl;
}
else if (status == std::future_status::ready) {
//表示线程成功放回
cout << "线程执行成功,返回" << endl;
cout << result.get() << endl;
}
else if (status == std::future_status::deferred) {
cout << "线程延迟执行" << endl;
cout << result.get() << endl;
}

future其他成员函数、shared_future、atomic

第十节 future其他成员函数、shared_future、atomic

在这里插入图片描述

一、std::future 的成员函数
1、std::future_status status = result.wait_for(std::chrono::seconds(几秒));
卡住当前流程,等待std::async()的异步任务运行一段时间,然后返回其状态std::future_status。如果std::async()的参数是std::launch::deferred(延迟执行),则不会卡住主流程。
std::future_status是枚举类型,表示异步任务的执行状态。类型的取值有
std::future_status::timeout
std::future_status::ready
std::future_status::deferred

1
2
3
4
5
6
7
8
9
10
11
12
13
14
15
16
17
18
19
20
21
22
23
24
25
26
#include <iostream>
#include <future>
using namespace std;
int mythread() {
cout << "mythread() start" << "threadid = " << std::this_thread::get_id() << endl;
std::chrono::milliseconds dura(5000);
std::this_thread::sleep_for(dura);
cout << "mythread() end" << "threadid = " << std::this_thread::get_id() << endl;
return 5;
}
int main() {
cout << "main" << "threadid = " << std::this_thread::get_id() << endl;
std::future<int> result = std::async(mythread);
cout << "continue........" << endl;
//cout << result1.get() << endl; //卡在这里等待mythread()执行完毕,拿到结果
//等待1秒
std::future_status status = result.wait_for(std::chrono::seconds(1));
if (status == std::future_status::timeout) {
//超时:表示线程还没有执行完
cout << "超时了,线程还没有执行完" << endl;
}
//类成员函数
return 0;
}

在这里插入图片描述

1
2
3
4
5
6
7
8
9
10
11
12
13
14
15
16
17
18
19
20
21
22
23
24
25
26
27
28
29
30
31
32
33
34
35
36
37
#include <iostream>
#include <future>
using namespace std;
int mythread() {
cout << "mythread() start" << "threadid = " << std::this_thread::get_id() << endl;
//std::chrono::milliseconds dura(5000);
//std::this_thread::sleep_for(dura);
cout << "mythread() end" << "threadid = " << std::this_thread::get_id() << endl;
return 5;
}
int main() {
cout << "main" << "threadid = " << std::this_thread::get_id() << endl;
std::future<int> result = std::async(std::launch::deferred, mythread);
//std::future<int> result = std::async(mythread);
cout << "continue........" << endl;
//cout << result1.get() << endl; //卡在这里等待mythread()执行完毕,拿到结果
std::future_status status = result.wait_for(std::chrono::seconds(6));
if (status == std::future_status::timeout) {
//超时:表示线程还没有执行完
cout << "超时了,线程还没有执行完" << endl;
}
else if (status == std::future_status::ready) {
//表示线程成功放回
cout << "线程执行成功,返回" << endl;
cout << result.get() << endl;
}
else if (status == std::future_status::deferred) {
//如果设置 std::future<int> result = std::async(std::launch::deferred, mythread);,则本条件成立
cout << "线程延迟执行" << endl;
cout << result.get() << endl;
}
cout << "good luck" << endl;
return 0;
}

get()只能使用一次,比如如果

1
2
auto a = result.get();
cout << result.get() << endl;

就会报告异常
因为get()函数的设计是一个移动语义,相当于将result中的值移动到了a中,再次get就报告了异常。

二、std::shared_future:也是个类模板
std::future的 get() 成员函数是转移数据

std::shared_future 的 get()成员函数是复制数据

1
2
3
4
5
6
7
8
9
10
11
12
13
14
15
16
17
18
19
20
21
22
23
24
25
26
27
28
29
30
31
32
#include <thread>
#include <iostream>
#include <future>
using namespace std;
int mythread() {
cout << "mythread() start" << "threadid = " << std::this_thread::get_id() << endl;
std::chrono::milliseconds dura(5000);
std::this_thread::sleep_for(dura);
cout << "mythread() end" << "threadid = " << std::this_thread::get_id() << endl;
return 5;
}
int main() {
cout << "main" << "threadid = " << std::this_thread::get_id() << endl;
std::packaged_task<int()> mypt(mythread);
std::thread t1(std::ref(mypt));
std::future<int> result = mypt.get_future();
bool ifcanget = result.valid(); //判断future 中的值是不是一个有效值
std::shared_future<int> result_s(result.share()); //执行完毕后result_s里有值,而result里空了
//std::shared_future<int> result_s(std::move(result));
//通过get_future返回值直接构造一个shared_future对象
//std::shared_future<int> result_s(mypt.get_future());
t1.join();
auto myresult1 = result_s.get();
auto myresult2 = result_s.get();
cout << "good luck" << endl;
return 0;
}

三、std::atomic原子操作

3.1 原子操作概念引出范例:
互斥量:多线程编程中 用于保护共享数据:先锁住, 操作共享数据, 解锁。

有两个线程,对一个变量进行操作,一个线程读这个变量的值,一个线程往这个变量中写值。

即使是一个简单变量的读取和写入操作,如果不加锁,也有可能会导致读写值混乱(一条C语句会被拆成3、4条汇编语句来执行,所以仍然有可能混乱)

1
2
3
4
5
6
7
8
9
10
11
12
13
14
15
16
17
18
#include <iostream>
#include <thread>
using namespace std;
int g_count = 0;
void mythread1() {
for (int i = 0; i < 1000000; i++) {
g_count++;
}
}
int main() {
std::thread t1(mythread1);
std::thread t2(mythread1);
t1.join();
t2.join();
cout << "正常情况下结果应该是200 0000次,实际是" << g_count << endl;
}

在这里插入图片描述

使用mutex解决这个问题

1
2
3
4
5
6
7
8
9
10
11
12
13
14
15
16
17
18
19
20
21
22
#include <iostream>
#include <thread>
#include <mutex>
using namespace std;
int g_count = 0;
std::mutex mymutex;
void mythread1() {
for (int i = 0; i < 1000000; i++) {
std::unique_lock<std::mutex> u1(mymutex);
g_count++;
}
}
int main() {
std::thread t1(mythread1);
std::thread t2(mythread1);
t1.join();
t2.join();
cout << "正常情况下结果应该是200 0000次,实际是" << g_count << endl;
}

在这里插入图片描述

3.2 基本的std::atomic用法范例
大家可以把原子操作理解成一种:不需要用到互斥量加锁(无锁)技术的多线程并发编程方式。

原子操作:在多线程中不会被打断的程序执行片段。

从效率上来说,原子操作要比互斥量的方式效率要高。

互斥量的加锁一般是针对一个代码段,而原子操作针对的一般都是一个变量。

原子操作,一般都是指“不可分割的操作”;也就是说这种操作状态要么是完成的,要么是没完成的,不可能出现半完成状态。

std::atomic来代表原子操作,是个类模板。其实std::atomic是用来封装某个类型的值的

需要添加#include 头文件

范例:

1
2
3
4
5
6
7
8
9
10
11
12
13
14
15
16
17
18
19
#include <iostream>
#include <thread>
#include <atomic>
using namespace std;
std::atomic<int> g_count = 0; //封装了一个类型为int的 对象(值)
void mythread1() {
for (int i = 0; i < 1000000; i++) {
g_count++;
}
}
int main() {
std::thread t1(mythread1);
std::thread t2(mythread1);
t1.join();
t2.join();
cout << "正常情况下结果应该是200 0000次,实际是" << g_count << endl;
}

在这里插入图片描述

1
2
3
4
5
6
7
8
9
10
11
12
13
14
15
16
17
18
19
20
21
22
23
24
25
#include <iostream>
#include <thread>
#include <atomic>
using namespace std;
std::atomic<bool> g_ifEnd = false; //封装了一个类型为bool的 对象(值)
void mythread() {
std::chrono::milliseconds dura(1000);
while (g_ifEnd == false) {
cout << "thread id = " << std::this_thread::get_id() << "运行中" << endl;
std::this_thread::sleep_for(dura);
}
cout << "thread id = " << std::this_thread::get_id() << "运行结束" << endl;
}
int main() {
std::thread t1(mythread);
std::thread t2(mythread);
std::chrono::milliseconds dura(5000);
std::this_thread::sleep_for(dura);
g_ifEnd = true;
cout << "程序执行完毕" << endl;
t1.join();
t2.join();
}

在这里插入图片描述

总结:
1、原子操作一般用于计数或者统计(如累计发送多少个数据包,累计接收到了多少个数据包),多个线程一起统计,这种情况如果不使用原子操作会导致统计发生混乱。

2、写商业代码时,如果不确定结果的影响,最好自己先写一小段代码调试。或者不要使用。

async、future、packaged_task、promise

第九节、async、future、packaged_task、promise

在这里插入图片描述

本节内容需要包含头文件#include

一、std::async、std::future创建后台任务并返回值
std::async是一个函数模板,用来启动一个异步任务,启动起来一个异步任务之后,它返回一个std::future对象,这个对象是个类模板。

什么叫“启动一个异步任务”?就是自动创建一个线程,并开始 执行对应的线程入口函数,它返回一个std::future对象,这个std::future对象中就含有线程入口函数所返回的结果,我们可以通过调用future对象的成员函数get()来获取结果。

“future”将来的意思,也有人称呼std::future提供了一种访问异步操作结果的机制,就是说这个结果你可能没办法马上拿到,但是在不久的将来,这个线程执行完毕的时候,你就能够拿到结果了,所以,大家这么理解:future中保存着一个值,这个值是在将来的某个时刻能够拿到。

std::future对象的get()成员函数会等待线程执行结束并返回结果,拿不到结果它就会一直等待,感觉有点像join()但是,它是可以获取结果的。

std::future对象的wait()成员函数,用于等待线程返回,本身并不返回结果,这个效果和 std::thread 的join()更像。

1
2
3
4
5
6
7
8
9
10
11
12
13
14
15
16
17
18
19
20
21
22
23
24
25
26
27
28
29
30
31
32
33
34
35
36
#include <iostream>
#include <future>
using namespace std;
class A {
public:
int mythread(int mypar) {
cout << mypar << endl;
return mypar;
}
};
int mythread() {
cout << "mythread() start" << "threadid = " << std::this_thread::get_id() << endl;
std::chrono::milliseconds dura(5000);
std::this_thread::sleep_for(dura);
cout << "mythread() end" << "threadid = " << std::this_thread::get_id() << endl;
return 5;
}
int main() {
A a;
int tmp = 12;
cout << "main" << "threadid = " << std::this_thread::get_id() << endl;
std::future<int> result1 = std::async(mythread);
cout << "continue........" << endl;
cout << result1.get() << endl; //卡在这里等待mythread()执行完毕,拿到结果
//类成员函数
std::future<int> result2 = std::async(&A::mythread, &a, tmp); //第二个参数是对象引用才能保证线程里执行的是同一个对象
cout << result2.get() << endl;
//或者result2.wait();
cout << "good luck" << endl;
return 0;
}

我们通过向std::async()传递一个参数,改参数是std::launch类型(枚举类型),来达到一些特殊的目的:

1、std::lunch::deferred:
(defer推迟,延期)表示线程入口函数的调用会被延迟,一直到std::future的wait()或者get()函数被调用时(由主线程调用)才会执行;如果wait()或者get()没有被调用,则不会执行。
实际上根本就没有创建新线程。std::lunch::deferred意思时延迟调用,并没有创建新线程,是在主线程中调用的线程入口函数。

1
2
3
4
5
6
7
8
9
10
11
12
13
14
15
16
17
18
19
20
21
#include <iostream>
#include <future>
using namespace std;
int mythread() {
cout << "mythread() start" << "threadid = " << std::this_thread::get_id() << endl;
std::chrono::milliseconds dura(5000);
std::this_thread::sleep_for(dura);
cout << "mythread() end" << "threadid = " << std::this_thread::get_id() << endl;
return 5;
}
int main() {
cout << "main" << "threadid = " << std::this_thread::get_id() << endl;
std::future<int> result1 = std::async(std::launch::deferred ,mythread);
cout << "continue........" << endl;
cout << result1.get() << endl; //卡在这里等待mythread()执行完毕,拿到结果
cout << "good luck" << endl;
return 0;
}

在这里插入图片描述

永远都会先打印出continue……..,然后才会打印出mythread() start和mythread() end等信息。

2、std::launch::async,在调用async函数的时候就开始创建新线程。

1
2
3
4
5
6
7
8
int main() {
cout << "main" << "threadid = " << std::this_thread::get_id() << endl;
std::future<int> result1 = std::async(std::launch::async ,mythread);
cout << "continue........" << endl;
cout << result1.get() << endl;
cout << "good luck" << endl;
return 0;
}

二、std::packaged_task:打包任务,把任务包装起来。
类模板,它的模板参数是各种可调用对象,通过packaged_task把各种可调用对象包装起来,方便将来作为线程入口函数来调用。

1
2
3
4
5
6
7
8
9
10
11
12
13
14
15
16
17
18
19
20
21
22
23
24
25
26
27
#include <thread>
#include <iostream>
#include <future>
using namespace std;
int mythread(int mypar) {
cout << mypar << endl;
cout << "mythread() start" << "threadid = " << std::this_thread::get_id() << endl;
std::chrono::milliseconds dura(5000);
std::this_thread::sleep_for(dura);
cout << "mythread() end" << "threadid = " << std::this_thread::get_id() << endl;
return 5;
}
int main() {
cout << "main" << "threadid = " << std::this_thread::get_id() << endl;
//我们把函数mythread通过packaged_task包装起来
//参数是一个int,返回值类型是int
std::packaged_task<int(int)> mypt(mythread);
std::thread t1(std::ref(mypt), 1);
t1.join();
std::future<int> result = mypt.get_future();
//std::future对象里包含有线程入口函数的返回结果,这里result保存mythread返回的结果。
cout << result.get() << endl;
return 0;
}

可调用对象可由函数换成lambda表达式

1
2
3
4
5
6
7
8
9
10
11
12
13
14
15
16
17
18
19
20
21
int main() {
cout << "main" << "threadid = " << std::this_thread::get_id() << endl;
std::packaged_task<int(int)> mypt([](int mypar) {
cout << mypar << endl;
cout << "mythread() start" << "threadid = " << std::this_thread::get_id() << endl;
std::chrono::milliseconds dura(5000);
std::this_thread::sleep_for(dura);
cout << "mythread() end" << "threadid = " << std::this_thread::get_id() << endl;
return 5;
});
std::thread t1(std::ref(mypt), 1);
t1.join();
std::future<int> result = mypt.get_future();
//std::future对象里包含有线程入口函数的返回结果,这里result保存mythread返回的结果。
cout << result.get() << endl;
cout << "good luck" << endl;
return 0;
}

packaged_task包装起来的可调用对象还可以直接调用,从这个角度来讲,packaged_task对象也是一个可调用对象
lambda的直接调用

1
2
3
4
5
6
7
8
9
10
11
12
13
14
15
int main() {
cout << "main" << "threadid = " << std::this_thread::get_id() << endl;
std::packaged_task<int(int)> mypt([](int mypar) {
cout << mypar << endl;
cout << "mythread() start" << "threadid = " << std::this_thread::get_id() << endl;
std::chrono::milliseconds dura(5000);
std::this_thread::sleep_for(dura);
cout << "mythread() end" << "threadid = " << std::this_thread::get_id() << endl;
return 5;
});
mypt(1);
std::future<int> result = mypt.get_future();
cout << result.get() << endl;
}

std::promise,类模板
我们能够在某个线程中给它赋值,然后我们可以在其他线程中,把这个值取出来

1
2
3
4
5
6
7
8
9
10
11
12
13
14
15
16
17
18
19
20
21
22
23
24
25
#include <thread>
#include <iostream>
#include <future>
using namespace std;
void mythread(std::promise<int> &tmp, int clac) {
cout << "mythread() start" << "threadid = " << std::this_thread::get_id() << endl;
std::chrono::milliseconds dura(5000);
std::this_thread::sleep_for(dura);
cout << "mythread() end" << "threadid = " << std::this_thread::get_id() << endl;
int result = clac;
tmp.set_value(result); //结果保存到了tmp这个对象中
return;
}
vector<std::packaged_task<int(int)>> task_vec;
int main() {
std::promise<int> myprom;
std::thread t1(mythread, std::ref(myprom), 180);
t1.join(); //在这里线程已经执行完了
std::future<int> fu1 = myprom.get_future(); //promise和future绑定,用于获取线程返回值
auto result = fu1.get();
cout << "result = " << result << endl;
}

总结:通过promise保存一个值,在将来某个时刻我们通过吧一个future绑定到这个promise上,来得到绑定的值

注意:使用thread时,必须 join() 或者 detach() 否则程序会报异常

小结:

我们学习这些东西的目的并不是,要把他们都用到实际开发中。

相反,如果我们能够用最少的东西写出一个稳定的,高效的多线程程序,更值得赞赏。

我们为了成长必须阅读一些高手写的代码,从而实现自己代码的积累;

condition_variable、wait、notify_one、notify_all

第八节 condition_variable、wait、notify_one、notify_all

在这里插入图片描述

一、条件变量condition_variable、wait、notify_one、notify_all
std::condition_variable实际上是一个类,是一个和条件相关的类,说白了就是等待一个条件达成。

1
2
3
4
5
6
7
8
9
std::mutex mymutex1;
std::unique_lock<std::mutex> sbguard1(mymutex1);
std::condition_variable condition;
condition.wait(sbguard1, [this] {if (!msgRecvQueue.empty())
return true;
return false;
});
condition.wait(sbguard1);

wait()用来等一个东西

如果第二个参数的lambda表达式返回值是false,那么wait()将解锁互斥量,并阻塞到本行
如果第二个参数的lambda表达式返回值是true,那么wait()直接返回并继续执行。

阻塞到什么时候为止呢?阻塞到其他某个线程调用notify_one()成员函数为止;

如果没有第二个参数,那么效果跟第二个参数lambda表达式返回false效果一样

wait()将解锁互斥量,并阻塞到本行,阻塞到其他某个线程调用notify_one()成员函数为止。

当其他线程用notify_one()将本线程wait()唤醒后,这个wait恢复后

1、wait()不断尝试获取互斥量锁,如果获取不到那么流程就卡在wait()这里等待获取,如果获取到了,那么wait()就继续执行,获取到了锁

2.1、如果wait有第二个参数就判断这个lambda表达式。

  • a)如果表达式为false,那wait又对互斥量解锁,然后又休眠,等待再次被notify_one()唤醒
  • b)如果lambda表达式为true,则wait返回,流程可以继续执行(此时互斥量已被锁住)。

2.2、如果wait没有第二个参数,则wait返回,流程走下去。

流程只要走到了wait()下面则互斥量一定被锁住了。

1
2
3
4
5
6
7
8
9
10
11
12
13
14
15
16
17
18
19
20
21
22
23
24
25
26
27
28
29
30
31
32
33
34
35
36
37
38
39
40
41
42
43
44
45
46
47
48
49
50
51
52
53
54
55
56
#include <thread>
#include <iostream>
#include <list>
#include <mutex>
using namespace std;
class A {
public:
void inMsgRecvQueue() {
for (int i = 0; i < 100000; ++i)
{
cout << "inMsgRecvQueue插入一个元素" << i << endl;
std::unique_lock<std::mutex> sbguard1(mymutex1);
msgRecvQueue.push_back(i);
//尝试把wait()线程唤醒,执行完这行,
//那么outMsgRecvQueue()里的wait就会被唤醒
//只有当另外一个线程正在执行wait()时notify_one()才会起效,否则没有作用
condition.notify_one();
}
}
void outMsgRecvQueue() {
int command = 0;
while (true) {
std::unique_lock<std::mutex> sbguard2(mymutex1);
// wait()用来等一个东西
// 如果第二个参数的lambda表达式返回值是false,那么wait()将解锁互斥量,并阻塞到本行
// 阻塞到什么时候为止呢?阻塞到其他某个线程调用notify_one()成员函数为止;
//当 wait() 被 notify_one() 激活时,会先执行它的 条件判断表达式 是否为 true,
//如果为true才会继续往下执行
condition.wait(sbguard2, [this] {
if (!msgRecvQueue.empty())
return true;
return false;});
command = msgRecvQueue.front();
msgRecvQueue.pop_front();
//因为unique_lock的灵活性,我们可以随时unlock,以免锁住太长时间
sbguard2.unlock();
cout << "outMsgRecvQueue()执行,取出第一个元素" << endl;
}
}
private:
std::list<int> msgRecvQueue;
std::mutex mymutex1;
std::condition_variable condition;
};
int main() {
A myobja;
std::thread myoutobj(&A::outMsgRecvQueue, &myobja);
std::thread myinobj(&A::inMsgRecvQueue, &myobja);
myinobj.join();
myoutobj.join();
}

二、深入思考

上面的代码可能导致出现一种情况:
因为outMsgRecvQueue()与inMsgRecvQueue()并不是一对一执行的,所以当程序循环执行很多次以后,可能在msgRecvQueue 中已经有了很多消息,但是,outMsgRecvQueue还是被唤醒一次只处理一条数据。这时可以考虑把outMsgRecvQueue多执行几次,或者对inMsgRecvQueue进行限流。

三、notify_all()

notify_one():通知一个线程的wait()

notify_all():通知所有线程的wait()

单例设计模式共享数据分析、解决,call_once

第七节 单例设计模式共享数据分析、解决,call_once

在这里插入图片描述

1.设计模式

  • 程序灵活,维护起来可能方便,用设计模式理念写出来的代码很晦涩,但是别人接管、阅读代码都会很痛苦
  • 老外应付特别大的项目时,把项目的开发经验、模块划分经验,总结整理成设计模式
  • 中国零几年设计模式刚开始火时,总喜欢拿一个设计模式往上套,导致一个小小的项目总要加几个设计模式,本末倒置
  • 设计模式有其独特的优点,要活学活用,不要深陷其中,生搬硬套

2.单例设计模式:
整个项目中,有某个或者某些特殊的类,只能创建一个属于该类的对象。
单例类:只能生成一个对象。

3.单例设计模式共享数据分析、解决
面临问题:需要在自己创建的线程中来创建单例类的对象,这种线程可能不止一个。我们可能面临GetInstance()这种成员函数需要互斥。
可以在加锁前判断m_instance是否为空,否则每次调用Singelton::getInstance()都要加锁,十分影响效率。

1
2
3
4
5
6
7
8
9
10
11
12
13
14
15
16
17
18
19
20
21
22
23
24
25
26
27
28
29
30
31
32
33
34
35
36
37
38
39
40
41
42
43
44
45
46
47
48
49
50
51
52
53
54
55
56
#include <iostream>
#include <mutex>
using namespace std;
mutex myMutex;
//懒汉模式
class Singelton
{
public:
static Singelton * getInstance() {
//双重锁定 提高效率
if (instance == NULL) {
lock_guard<mutex> myLockGua(myMutex);
if (instance == NULL) {
instance = new Singelton;
}
}
return instance;
}
private:
Singelton() {}
static Singelton *instance;
};
Singelton * Singelton::instance = NULL;
//饿汉模式
class Singelton2 {
public:
static Singelton2* getInstance() {
return instance;
}
private:
Singelton2() {}
static Singelton2 * instance;
};
Singelton2 * Singelton2::instance = new Singelton2;
int main(void)
{
Singelton * singer = Singelton::getInstance();
Singelton * singer2 = Singelton::getInstance();
if (singer == singer2)
cout << "二者是同一个实例" << endl;
else
cout << "二者不是同一个实例" << endl;
cout << "---------- 以下 是 饿汉式 ------------" << endl;
Singelton2 * singer3 = Singelton2::getInstance();
Singelton2 * singer4 = Singelton2::getInstance();
if (singer3 == singer4)
cout << "二者是同一个实例" << endl;
else
cout << "二者不是同一个实例" << endl;
return 0;
}

如果觉得在单例模式new了一个对象,而没有自己delete掉,这样不合理。可以增加一个类中类CGarhuishou,new一个单例类时创建一个静态的CGarhuishou对象,这样在程序结束时会调用CGarhuishou的析构函数,释放掉new出来的单例对象。

1
2
3
4
5
6
7
8
9
10
11
12
13
14
15
16
17
18
19
20
21
22
23
24
25
26
class Singelton
{
public:
static Singelton * getInstance() {
if (instance == NULL) {
static CGarhuishou huishou;
instance = new Singelton;
}
return instance;
}
class CGarhuishou {
public:
~CGarhuishou()
{
if (Singelton::instance)
{
delete Singelton::instance;
Singelton::instance = NULL;
}
}
};
private:
Singelton() {}
static Singelton *instance;
};
Singelton * Singelton::instance = NULL;

4.std::call_once():
函数模板,该函数的第一个参数为标记,第二个参数是一个函数名(如a())。
功能:能够保证函数a()只被调用一次。具备互斥量的能力,而且比互斥量消耗的资源更少,更高效。
call_once()需要与一个标记结合使用,这个标记为std::once_flag;其实once_flag是一个结构,call_once()就是通过标记来决定函数是否执行,调用成功后,就把标记设置为一种已调用状态。

多个线程同时执行时,一个线程会等待另一个线程先执行。

1
2
3
4
5
6
7
8
9
10
11
12
13
14
15
16
17
18
once_flag g_flag;
class Singelton
{
public:
static void CreateInstance()//call_once保证其只被调用一次
{
instance = new Singelton;
}
//两个线程同时执行到这里,其中一个线程要等另外一个线程执行完毕
static Singelton * getInstance() {
call_once(g_flag, CreateInstance);
return instance;
}
private:
Singelton() {}
static Singelton *instance;
};
Singelton * Singelton::instance = NULL;

unique_lock(类模板)详解

第六节 unique_lock(类模板)详解

在这里插入图片描述

1.unique_lock取代lock_guard
unique_lock比lock_guard灵活很多(多出来很多用法),效率差一点。
unique_lock myUniLock(myMutex);

2.unique_lock的第二个参数
2.1 std::adopt_lock:

  • 表示这个互斥量已经被lock(),即不需要在构造函数中lock这个互斥量了。
  • 前提:必须提前lock
  • lock_guard中也可以用这个参数

2.2 std::try_to_lock:

  • 尝试用mutx的lock()去锁定这个mutex,但如果没有锁定成功,会立即返回,不会阻塞在那里;
  • 使用try_to_lock的原因是防止其他的线程锁定mutex太长时间,导致本线程一直阻塞在lock这个地方
  • 前提:不能提前lock();
  • owns_locks()方法判断是否拿到锁,如拿到返回true

2.3 std::defer_lock:

  • 如果没有第二个参数就对mutex进行加锁,加上defer_lock是始化了一个没有加锁的mutex
  • 不给它加锁的目的是以后可以调用unique_lock的一些方法
  • 前提:不能提前lock

3.unique_lock的成员函数(前三个与std::defer_lock联合使用)
3.1 lock():加锁。

1
2
unique_lock<mutex> myUniLock(myMutex, defer_lock);
myUniLock.lock();

不用自己unlock();

3.2 unlock():解锁。

1
2
3
4
5
6
7
unique_lock<mutex> myUniLock(myMutex, defer_lock);
myUniLock.lock();
//处理一些共享代码
myUniLock.unlock();
//处理一些非共享代码
myUniLock.lock();
//处理一些共享代码

因为一些非共享代码要处理,可以暂时先unlock(),用其他线程把它们处理了,处理完后再lock()。

3.3 try_lock():尝试给互斥量加锁
如果拿不到锁,返回false,否则返回true。

3.4 release():

  • unique_lock
    myUniLock(myMutex);相当于把myMutex和myUniLock绑定在了一起,release()就是解除绑定,返回它所管理的mutex对象的指针,并释放所有权
  • mutex* ptx =
    myUniLock.release();所有权由ptx接管,如果原来mutex对象处理加锁状态,就需要ptx在以后进行解锁了。

lock的代码段越少,执行越快,整个程序的运行效率越高。
a.锁住的代码少,叫做粒度细,执行效率高;
b.锁住的代码多,叫做粒度粗,执行效率低;

4.unique_lock所有权的传递
unique_lock myUniLock(myMutex);把myMutex和myUniLock绑定在了一起,也就是myUniLock拥有myMutex的所有权
1. 使用move转移

  • myUniLock拥有myMutex的所有权,myUniLock可以把自己对myMutex的所有权转移,但是不能复制。
  • unique_lock myUniLock2(std::move(myUniLock));
    现在myUniLock2拥有myMutex的所有权。

2. 在函数中return一个临时变量,即可以实现转移

1
2
3
4
5
6
7
unique_lock<mutex> aFunction()
{
unique_lock<mutex> myUniLock(myMutex);
//移动构造函数那里讲从函数返回一个局部的unique_lock对象是可以的
//返回这种局部对象会导致系统生成临时的unique_lock对象,并调用unique_lock的移动构造函数
return myUniLock;
}

创建多个线程、数据共享问题分析、案例代码

第四节 创建多个线程、数据共享问题分析、案例代码

在这里插入图片描述

一、创建和等待多个线程

1
2
3
4
5
6
7
8
9
10
11
12
13
14
15
void TextThread()
{
cout << "我是线程" << this_thread::get_id() << endl;
/* … */
cout << "线程" << this_thread::get_id() << "执行结束" << endl;
}
//main函数里 vector threadagg;
for (int i = 0; i < 10; ++i)
{
threadagg.push_back(thread(TextThread));
}
for (int i = 0; i < 10; ++i)
{
threadagg[i].join();
}
  • 把thread对象放入到容器中管理,看起来像个thread对象数组,对一次创建大量的线程并对大量线程进行管理有好处
  • 多个线程执行顺序是乱的,跟操作系统内部对线程的运行调度机制有关

二:数据共享问题分析
2.1 只读的数据

  • 是安全稳定的

2.2 有读有写

  • 若不加处理,就会出错
  • 最简单的防止崩溃方法:读的时候不能写,写的时候不能读。
  • 写的动作分10小步,由于任务切换,导致各种诡异的事情发生(最可能的还是崩溃)